

Bitcoin Alternative: Monero – Wie mine ich diesen Coin?
Kryptowährungen sind in aller Munde, jeder möchte Sie, viele haben Sie. Doch wie kann ich ohne Kaufabsichten vom digitalen Coin profitieren? Lohnt sich das CPU / GPU Mining? Und wie kann ich hierbei am besten Profite erwirtschaften. Was ist ein Mining Pool und welchen Pool sollte ich verwenden. in diesem Posting geben wir eine Schritt für Schritt Anleitung zum eigenen XMR Mining Pool.Dieses HowTo nutzt als Ausgangsbasis eine Linux Ubuntu Distribution der Version 14.X (64Bit) sowie basiert auf dem node-cryptonote-pool. Auch der etwas neuere cryptonote-forknote-pool kann mit dieser Anleitung genutzt werden.
High performance Node.js (with native C addons) mining pool for CryptoNote based coins such as Bytecoin, Monero, QuazarCoin, HoneyPenny, etc.. Comes with lightweight example front-end script which uses the pool’s AJAX API.
Ubuntu Monero Mining Pool Hosting
Inhalte:
- Voraussetzungen
- Download & Installation
- Konfiguration
- Bereitstellen des Front-Ends
- Einrichten von Nginx und Let’s Encrypt SSL
- Donations
- Credits
Voraussetzungen
- Ubuntu Version 14.4.x
- Coin daemon(s) (Coin Wallet bspw. Monerod-Wallet)
- Node.js v0.10+ (Dies ist eine alte Version) Version wie bspw. 8.x sind nicht lauffähig
- Redis-Server key-value store v2.6+
Download & Installation der benötigten Software
Nachdem Ubuntu erfolgreich installiert und die Erstkonfiguration erfolgt ist benötigen wir zunächst noch einmal folgende Software:
1/5) Update der Paketlisten:
sudo apt-get update && apt-get upgrade
2/5) Installation der benötigten Tools:
apt-get install automake autoconf pkg-config libcurl4-openssl-dev libjansson-dev libssl-dev libboost-all-dev libgmp-dev make g++ git screen
Während die Tools installieren, kann in einem zweiten Terminal bereits damit begonnen werden die Monero-Software zu installieren. Wie das geht haben wir in einem separaten Blog Post detailliert beschrieben. Die Anleitung finden Sie hier.
3/5) Installation der Node.js Software in der Version 0.10+
Da es sich hierbei um eine doch sehr alte Version handelt, kann diese nicht über den Paketmanager installiert werden! Bitte unbedingt die folgenden Schritte beachten! Mit einer anderen Node.js Version kann die Installation unter Umständen abbrechen und wird daher sehr wahrscheinlich NICHT funktionieren!
wget https://nodejs.org/dist/latest-v0.10.x/node-v0.10.48-linux-x64.tar.gz
Nun installieren wir die passende Node.js Version durch die Eingabe folgender Befehle:
sudo tar -C /usr/local --strip-components 1 -xzf node-v0.10.48-linux-x64.tar.gz
# Nun folgen zwei symlinks:
sudo ls -l /usr/local/bin/node
sudo ls -l /usr/local/bin/npm
Node.js und npm ist nun erfolgreich in der richtigen Version installiert.
4/5) Installation des redis Key-Value Store
wget http://download.redis.io/redis-stable.tar.gz
tar xvzf redis-stable.tar.gz
cd redis-stable
make
Durch optionale Eingabe von
make test
kann dieser Build auf die Richtigkeit überprüft werden.
Mit
make install
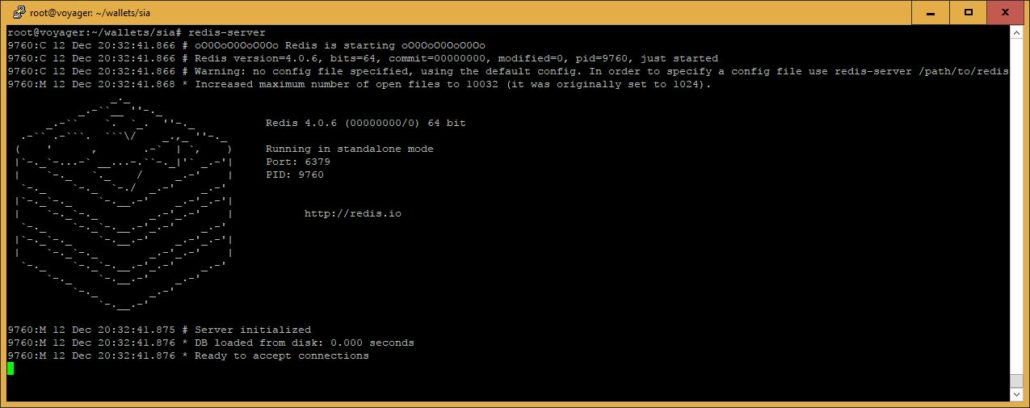
Beenden wir die Installation. Nun starten wir den Server durch Eingabe von:
redis-server
In einem zweiten Terminal geben wir
redis-cli ping
ein worauf wir ein PONG erhalten, wenn der Server erfolgreich gestartet wurde. Damit der spätere Miningserver ohne offene Terminalfenster arbeitet, installieren wir den Redis-Server als Systemdienst damit dieser nach etwaigen Neustarts weiterhin funktioniert und automatisch gestartet wird.
sudo mkdir /etc/redis
sudo mkdir -p /var/redis/6379
Nun kopieren wir das Init-Skript. Wir empfehlen die Nutzung des Ports als Dateiname. Bearbeitet diese Datei und achtet auf den richtigen Port! Ggf. den Port anpassen.
sudo cp utils/redis_init_script /etc/init.d/redis_6379
Nun kopieren wir das Redis-Configurationfile in unser Konfigurationsverzeichnis durch:
sudo cp redis.conf /etc/redis/6379.conf
nano /etc/redis/6379.conf
Bearbeitet die Konfigurationsdatei wie folgt:
- Setze daemonize auf yes (standardmäßig ist es auf no eingestellt).
- Setzen pidfile auf /var/run/redis_6379.pid (ändern Sie den Port bei Bedarf).
- Ändern Sie den Port entsprechend. In unserem Beispiel wird es nicht benötigt, da der Standard Port bereits 6379 ist.
- Lege logfile auf /var/log/redis_6379.log fest
- Setze dir auf /var/redis/6379 (sehr wichtiger Schritt!)
Nun fügen wir unser Startskript hinzu und starten den Redis-Server
sudo update-rc.d redis_6379 defaults
sudo /etc/init.d/redis_6379 start
5/5) Installation der Pool-Software
git clone https://github.com/zone117x/node-cryptonote-pool.git pool
cd pool
npm update
Nachdem npm alle benötigen Module heruntergeladen und installiert hat, sollte die Pool-Software lauffähig installiert sein. Nun kopieren wir die standardmäßige Konfigurationsdatei und passen Sie nach Belieben an!
mv config_example.json config.json
Konfiguration: Erklärung und Definition der Konfigurationsdatei:
/* Used for storage in redis so multiple coins can share the same redis instance. */
"coin": "monero",

/* Used for front-end display */
"symbol": "XMR",

"logging": {

    "files": {

        /* Specifies the level of log output verbosity. This level and anything
           more severe will be logged. Options are: info, warn, or error. */
        "level": "info",

        /* Directory where to write log files. */
        "directory": "logs",

        /* How often (in seconds) to append/flush data to the log files. */
        "flushInterval": 5
    },

    "console": {
        "level": "info",
        /* Gives console output useful colors. If you direct that output to a log file
           then disable this feature to avoid nasty characters in the file. */
        "colors": true
    }
},

/* Modular Pool Server */
"poolServer": {
    "enabled": true,

    /* Set to "auto" by default which will spawn one process/fork/worker for each CPU
       core in your system. Each of these workers will run a separate instance of your
       pool(s), and the kernel will load balance miners using these forks. Optionally,
       the 'forks' field can be a number for how many forks will be spawned. */
    "clusterForks": "auto",

    /* Address where block rewards go, and miner payments come from. */
    "poolAddress": "48firQdjLmgKktZ96CVvb3Efe56GLkKiUG63M6bHsZWtiYYsLfg43TFR72G3RwJnLJ4d4fc6MkMfJi93yvDbNHV6BDwcs6L"

    /* Poll RPC daemons for new blocks every this many milliseconds. */
    "blockRefreshInterval": 1000,

    /* How many seconds until we consider a miner disconnected. */
    "minerTimeout": 900,

    "ports": [
        {
            "port": 3333, //Port for mining apps to connect to
            "difficulty": 100, //Initial difficulty miners are set to
            "desc": "Low end hardware" //Description of port
        },
        {
            "port": 5555,
            "difficulty": 2000,
            "desc": "Mid range hardware"
        },
        {
            "port": 7777,
            "difficulty": 10000,
            "desc": "High end hardware"
        }
    ],

    /* Variable difficulty is a feature that will automatically adjust difficulty for
       individual miners based on their hashrate in order to lower networking and CPU
       overhead. */
    "varDiff": {
        "minDiff": 2, //Minimum difficulty
        "maxDiff": 100000,
        "targetTime": 100, //Try to get 1 share per this many seconds
        "retargetTime": 30, //Check to see if we should retarget every this many seconds
        "variancePercent": 30, //Allow time to very this % from target without retargeting
        "maxJump": 100 //Limit diff percent increase/decrease in a single retargetting
    },

    /* Feature to trust share difficulties from miners which can
       significantly reduce CPU load. */
    "shareTrust": {
        "enabled": true,
        "min": 10, //Minimum percent probability for share hashing
        "stepDown": 3, //Increase trust probability % this much with each valid share
        "threshold": 10, //Amount of valid shares required before trusting begins
        "penalty": 30 //Upon breaking trust require this many valid share before trusting
    },

    /* If under low-diff share attack we can ban their IP to reduce system/network load. */
    "banning": {
        "enabled": true,
        "time": 600, //How many seconds to ban worker for
        "invalidPercent": 25, //What percent of invalid shares triggers ban
        "checkThreshold": 30 //Perform check when this many shares have been submitted
    },
    /* [Warning: several reports of this feature being broken. Proposed fix needs to be tested.]
        Slush Mining is a reward calculation technique which disincentivizes pool hopping and rewards
        'loyal' miners by valuing younger shares higher than older shares. Remember adjusting the weight!
        More about it here: https://mining.bitcoin.cz/help/#!/manual/rewards */
    "slushMining": {
        "enabled": false, //Enables slush mining. Recommended for pools catering to professional miners
        "weight": 300, //Defines how fast the score assigned to a share declines in time. The value should roughly be equivalent to the average round duration in seconds divided by 8. When deviating by too much numbers may get too high for JS.
        "lastBlockCheckRate": 1 //How often the pool checks the timestamp of the last block. Lower numbers increase load but raise precision of the share value
    }
},

/* Module that sends payments to miners according to their submitted shares. */
"payments": {
    "enabled": true,
    "interval": 600, //how often to run in seconds
    "maxAddresses": 50, //split up payments if sending to more than this many addresses
    "mixin": 3, //number of transactions yours is indistinguishable from
    "transferFee": 5000000000, //fee to pay for each transaction
    "minPayment": 100000000000, //miner balance required before sending payment
    "denomination": 100000000000 //truncate to this precision and store remainder
},

/* Module that monitors the submitted block maturities and manages rounds. Confirmed
   blocks mark the end of a round where workers' balances are increased in proportion
   to their shares. */
"blockUnlocker": {
    "enabled": true,
    "interval": 30, //how often to check block statuses in seconds

    /* Block depth required for a block to unlocked/mature. Found in daemon source as
       the variable CRYPTONOTE_MINED_MONEY_UNLOCK_WINDOW */
    "depth": 60,
    "poolFee": 1.8, //1.8% pool fee (2% total fee total including donations)
    "devDonation": 0.1, //0.1% donation to send to pool dev - only works with Monero
    "coreDevDonation": 0.1 //0.1% donation to send to core devs - only works with Monero
},

/* AJAX API used for front-end website. */
"api": {
    "enabled": true,
    "hashrateWindow": 600, //how many second worth of shares used to estimate hash rate
    "updateInterval": 3, //gather stats and broadcast every this many seconds
    "port": 8117,
    "blocks": 30, //amount of blocks to send at a time
    "payments": 30, //amount of payments to send at a time
    "password": "test" //password required for admin stats
},

/* Coin daemon connection details. */
"daemon": {
    "host": "127.0.0.1",
    "port": 18081
},

/* Wallet daemon connection details. */
"wallet": {
    "host": "127.0.0.1",
    "port": 8082
},

/* Redis connection into. */
"redis": {
    "host": "127.0.0.1",
    "port": 6379,
    "auth": null //If set, client will run redis auth command on connect. Use for remote db
}
Starten können wir den Pool nun durch die Eingabe von:
node init.js
Wir starten den Pool via Screen, um die Software im Hintergrund laufen zu lassen:
screen -S miningpool node init.js
Mit screen -r miningpool können wir nun jederzeit wieder per Terminal auf den Pool zugreifen. Mit STRG + A + D können wir den Tab wieder beenden.
Bereitstellen des Front-End
Inhalt folgt in kürze…
Einrichten von Nginx und Let’s Encrypt SSL
Wir benötigen einen bereits installieren Nginx-Webserver wie das geht könnt Ihr hier noch einmal im Detail nachlesen: Wie installiere ich einen Nginx-Webserver auf Ubuntu oder Debian
Donations
- BTC:
16Dh4d8sdhUqQbKs9npWBf3nSU1igmL5yL
- ETH:
0xC3E4A9F95638c57a848C8dcE56f2A51D35c05340
- LTC:
LgiRVCJvbA1jNeQJv5uJCnZZMQGz5R2Y1K
- XMR:
48firQdjLmgKktZ96CVvb3Efe56GLkKiUG63M6bHsZWtiYYsLfg43TFR72G3RwJnLJ4d4fc6MkMfJi93yvDbNHV6BDwcs6L
- BCN:
24ayJZ8hAzxgxAEYaaDAyhV8KH1QrRuzdZsGXFZw3xKaMj6b3cumuzMfNCezqRpKfLJf5dmANoy6uA2bGtZ3uT5fJHdE2cM


Hallo,
ich sitze grade an der installation des Pools auf meinen Ubuntu Server. Jedoch erhalten ich folgende Fehlermeldung:#[email protected] install: `node-gyp rebuild´
Exit status 1
npm ERR!
npm ERR! Failed at the [email protected].1 install script ’node-gyp rebuild‘.
npm ERR! This is most likely a problem with the bignum package,
npm ERR! not with npm itself.
npm ERR! Tell the author that this fails on your system:
npm ERR! node-gyp rebuild
npm ERR! You can get information on how to open an issue for this project with:
npm ERR! npm bugs bignum
npm ERR! Or if that isn’t available, you can get their info via:
npm ERR!
npm ERR! npm owner ls bignum
npm ERR! There is likely additional logging output above.
npm ERR! Please include the following file with any support request:
npm ERR! /root/redis-stable/pool/npm-debug.log
Können Sie mir da helfen?
Danke
Und was ist ist mit diesem Fehler gemeint?
2020-03-10 10:06:02 [api] Error getting daemon data {„code“:“ECONNREFUSED“,“errno“:“ECONNREFUSED“,“syscall“:“connect“}
2020-03-10 10:06:02 [api] Stat collection finished: NaN ms redis, 3 ms daemon
2020-03-10 10:06:02 [api] Error collecting all stats
2020-03-10 10:06:02 [pool] (Thread 1) Error polling getblocktemplate {„code“:“ECONNREFUSED“,“errno“:“ECONNREFUSED“,“syscall“:“connect“}
2020-03-10 10:06:03 [pool] (Thread 1) Error polling getblocktemplate {„code“:“ECONNREFUSED“,“errno“:“ECONNREFUSED“,“syscall“:“connect“}
2020-03-10 10:06:04 [pool] (Thread 1) Error polling getblocktemplate {„code“:“ECONNREFUSED“,“errno“:“ECONNREFUSED“,“syscall“:“connect“}
2020-03-10 10:06:05 [pool] (Thread 1) Error polling getblocktemplate {„code“:“ECONNREFUSED“,“errno“:“ECONNREFUSED“,“syscall“:“connect“}
2020-03-10 10:06:06 [pool] (Thread 1) Error polling getblocktemplate {„code“:“ECONNREFUSED“,“errno“:“ECONNREFUSED“,“syscall“:“connect“}
Ist der Monerodaemon vollständig synchronisiert?
Eine nicht 100% synchrone Instanz würde diese Fehler beim Verwenden einer Poolsoftware auslösen.
Hallo, der im Tutorial erwähnte Pool ist mittlerweile etwas überholt.
Eine neuere Variante wäre bspw.: https://github.com/dvandal/cryptonote-nodejs-pool
In Verbindung mit nodejs 13x sollte es funktionieren.